AWS — How to Host a LAMP Web Application Server on AWS EC2 For Free
UPDATED 2020/10/16:
- I walked through this exercise again.
- All of the screenshots have been updated so that this article is accurate for the new EC2 experience in 2020!
- All commands have been updated so that newer versions of MySQL and PHP are installed.Amazon Web Services (AWS) is by far the best cloud service on the market. Its free tier allows everyone to run EC2 instances for up to 750hours per month, which means we can host a web application server for free! This article covers how to quickly launch an EC2 instance and have LAMP (Linux, Apache, MySQL and PHP) automatically pre-installed.
Step 1 — Login to your AWS Console (you need to register for AWS account if you don’t have one yet)
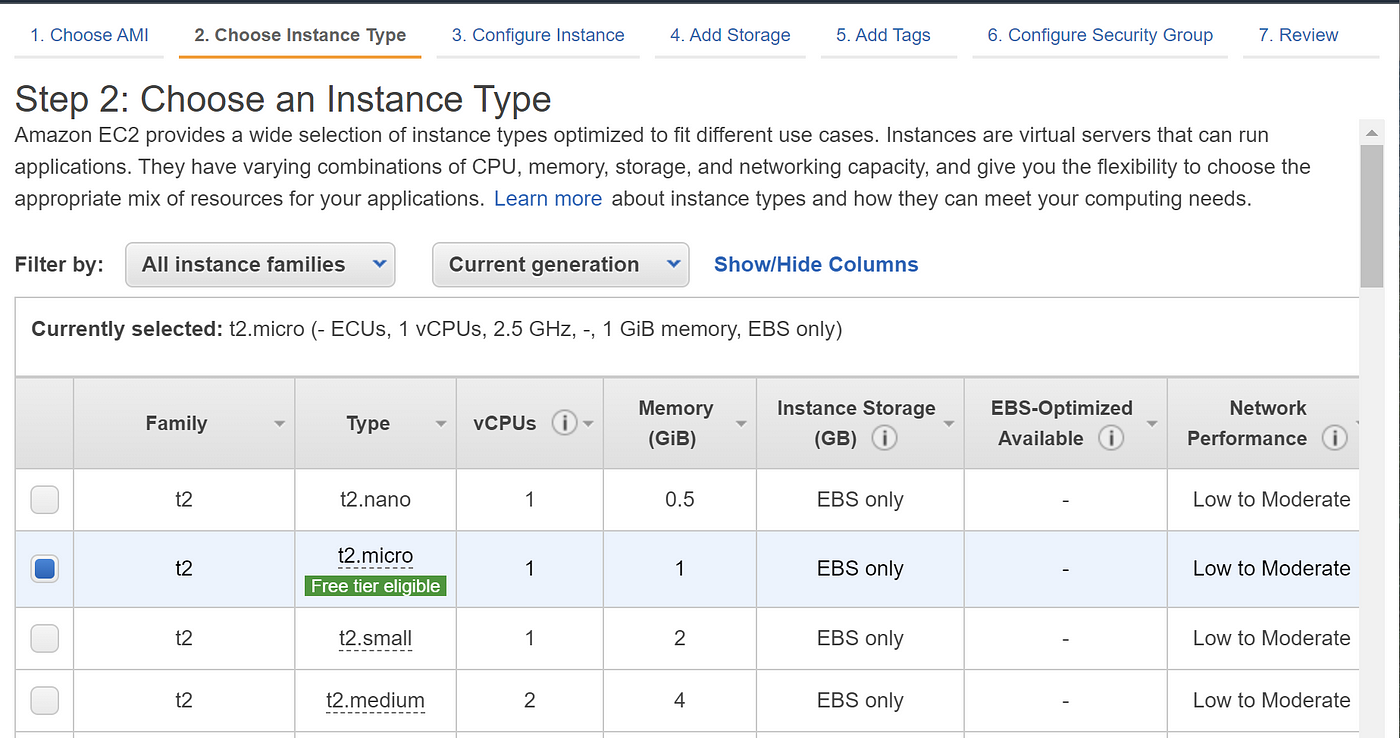
Step 2 — Launch an EC2 instance

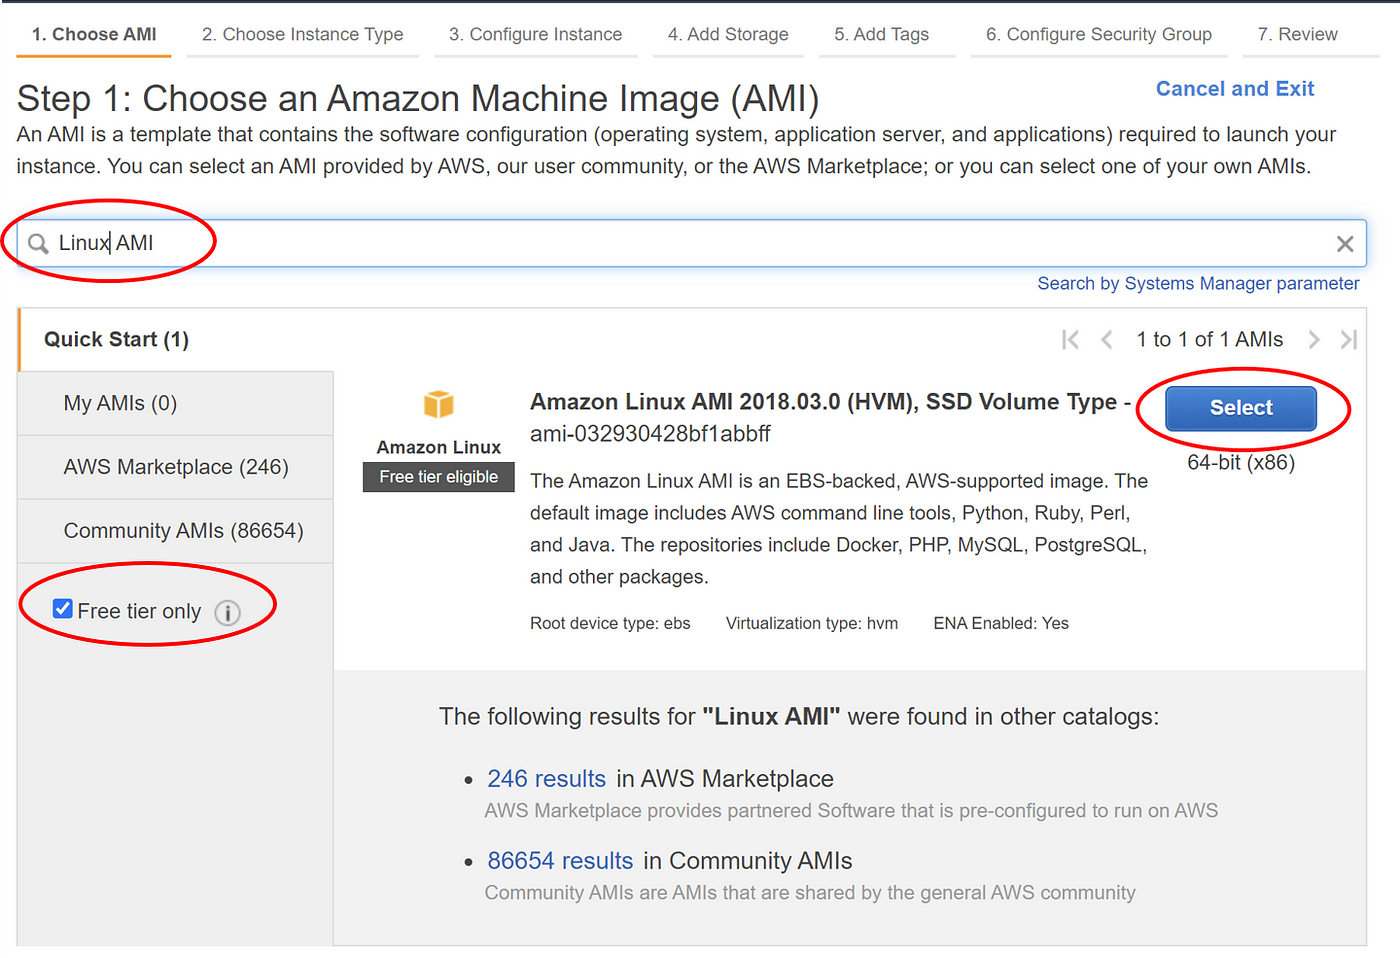
Search for Linux AMI and Select the Amazon Linux AMI Image
At section “3: Configure Instance Details”, look for Advanced Details and enter the following code in the “User data” part. Please note that as of 2020/10/16, the following code has been updated for newer versions of MySQL and PHP.
#!/bin/bash
sudo yum update -y
sudo yum install -y httpd24 php72 mysql57-server php72-mysqlnd
sudo service httpd start
sudo chkconfig httpd on
sudo usermod -a -G apache ec2-user
sudo chown -R ec2-user:apache /var/www
sudo chmod 2775 /var/www
find /var/www -type d -exec sudo chmod 2775 {} \; find /var/www -type f -exec sudo chmod 0664 {} \;
echo “<?php phpinfo(); ?>” > /var/www/html/phpinfo.php
Keep clicking “Next” until you get to “Step 6: Configure Security Group”, add rules to allow SSH, HTTP, HTTPS, and MySQL. See screenshot below:
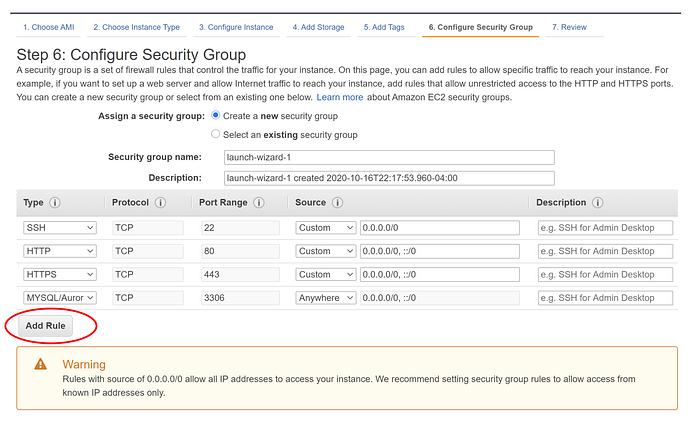
IMPORTANT: If you want to secure your server, you can specify the “Source” to be your own IP only (Google “What is my IP”). For tutorial purpose here, we allow all IPs (0.0.0.0/0, ::/0) and ignore the warning.
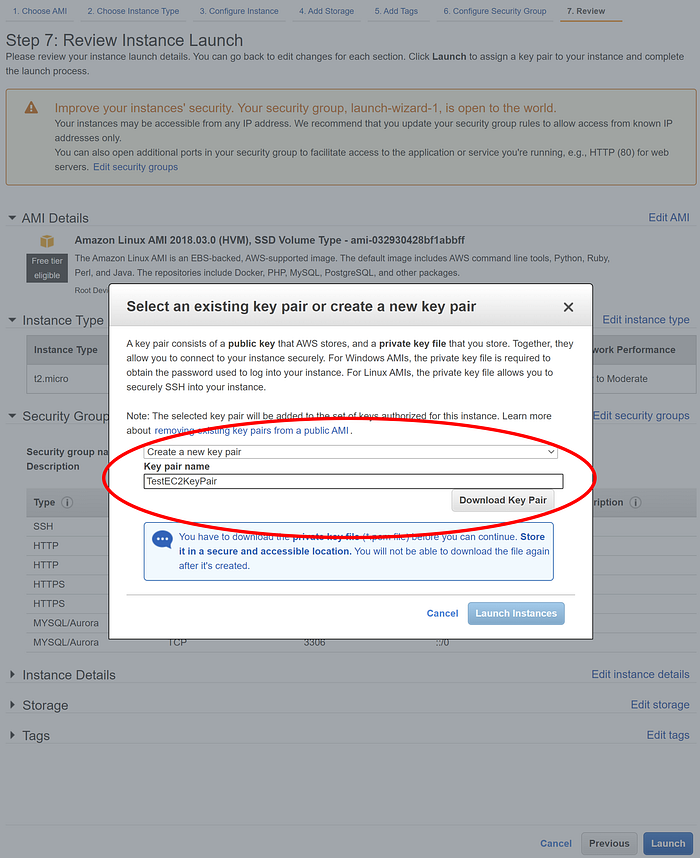
Keep clicking “Next” and you will be asked to create a Key Pair at “Step 7 : Review”. Make sure you download the Key Pair and then click “Launch Instances”. The key pair is a file that works like a password, or a ticket to a park, you have to save it somewhere you know (e.g. Desktop)for future use.
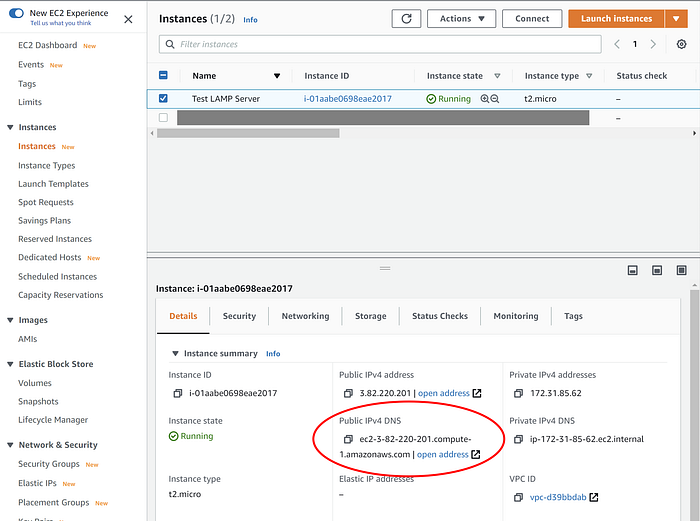
Step 3 — Verify everything is up and running.
Go back to the EC2 instances page, you will see your new EC2 instance running (it may take a couple of minutes). To confirm that you have Apache up and running, copy the “Public DNS (IPV4)” address to your browser and you should see the Apache page.

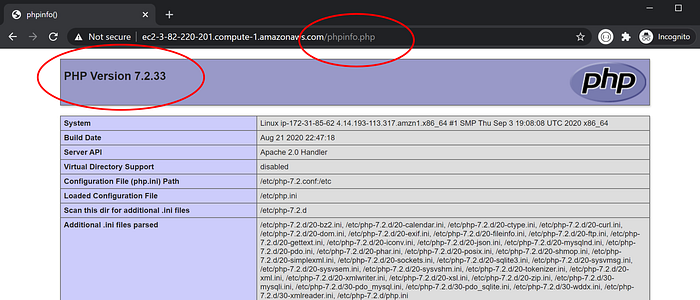
Add /phpinfo.php to the end of your URL, you should see that PHP is up and running as well. (It is best to delete this file later if you need to use this server for production as it contains sensitive information).
UPDATED 2020/10/16, please note that the command above has been updated and this screenshot will display PHP 7.2 instead of PHP 5.
Congratulations! You now have a full LAMP server up and running!
In the next tutorial, I will show you how to connect to your server and configure your MySQL database. Meanwhile, you can right click your EC2 instance and click “Connect” in order to read about how to connect.