Proper Use of Serilog for Log Stream and Filesystem on Azure App Service
Discussing how to use Serilog for both filesystem and log stream on Azure App Service for ASP.NET Core Web API in details.

UPDATE April 10, 2022: all projects in the GitHub repo have been upgraded to .NET 5.
Goal
Does this sound familiar? “XXX works perfectly locally, but does not work at all in production”. The same mystery applies to structured logging using Serilog!
This is a very short article aiming to discuss how to setup Serilog in an ASP.NET Core Web API project so that it works flawlessly both in development locally and also in production on Azure App Service.
Getting Started
Not to waste any time, so let’s get straight into it!
Prerequisites:
- A new or existing ASP.NET Core API project
- (optional) API deployed on Azure App Service if you want to test production environment
Step 1 — Add Environment Variable
The environment variable, ASPNETCORE_ENVIRONMENT, will be used to determine whether the application is running in Development mode or Production mode. Setting it as “Development” here allows us to put configuration values in appsettings.Development.json, which will get created soon.

Step 2 — Install Serilog NuGet packages
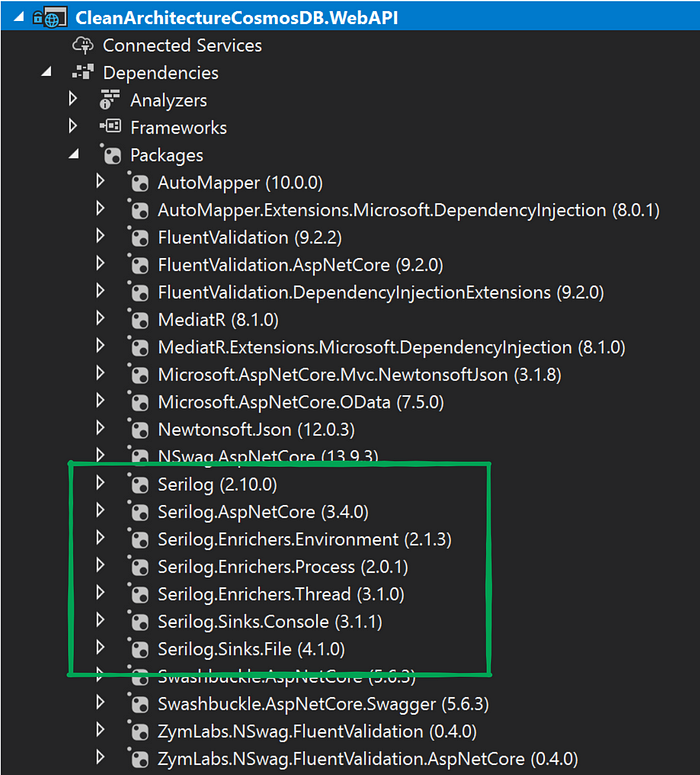
Assuming we want to write the logs to both the Console and also rolling text files, we can use the following Serilog packages:

Step 3— Create appsettings.Development.json
This is a JSON file where we store configuration values that will be used when the application runs in development mode, which is specified in Step 1. As you can see in the GitHub Gist below, logging will be written into both the Console and a rolling file with a rolling interval of day, which means each day, a new text file will be created for logging. The name of the text will become log-todo-api-20210123.txt, while the date is appended by Serilog.
You can clear the appsettings.json content if all configuration values are stored in environment-specific json file, and just leave an empty curly brackets, {}.
Step 4 — Configure Serilog in Program.cs
The main method is Program.cs is the entry point for the application. We will register Serilog here so that we can start using Serilog the moment the application runs, even before the web host is up and running! Please notice:
- Configuration is strongly typed and is read from JSON files by calling AddJsonFile.
- The appsettings.Development.json file created above is loaded by calling AddJsonFile with file name $”appsettings.{Environment.GetEnvironmentVariable(“ASPNETCORE_ENVIRONMENT”)}.json”. Notice in step 1, we have set the value of ASPNETCORE_ENVIRONMENT to Development.
- Once Configuration is loaded, we configure Serilog by reading Configuration value for log levels, sinks, and enrichers, etc..
- Don’t forget to call UseSerilog() when building the web host in line 69 and line 70, otherwise, the default logging provider, ILogger will be used instead.
Step 5— Add appsettings.Production.json
When the application is deployed to Azure App Service, C: drive is not accessible and the log files need to stored on D: drive, “D:\\home\\LogFiles\\http\\RawLogs”. Let’s create the appsettings.Production.json file to store the configuration values for Production environment.
Step 6— Add Application settings to Azure App Service
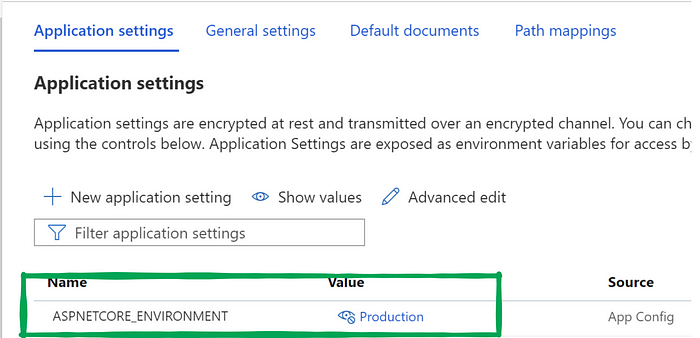
Within Azure Portal, add ASPNETCORE_ENVIRONMENT to the Application settings. Instead of “Development”, we will use “Production” here. Navigate to the App Service for the application, then navigate to Configuration:

Step 7 — Turn on App Service Logs to Filesystem in App Service
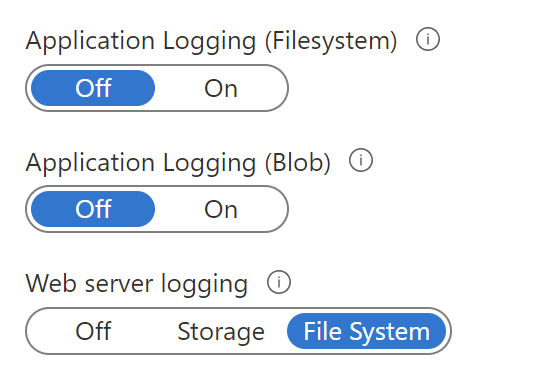
Within Azure Portal, navigate to App Service logs, Turn on Web server logging. This creates the folder path “D:\home\LogFiles\http\RawLogs” and starts writing server log files there. A few benefits of us writing Serilog rolling files in the same location:
- One single spot to access logs
- When Application Logging (Filesystem) is turned on, you can view the Serilog logs in the Log Stream under App Service Monitoring section as well! Awesome!


Step 8 — Test and view the log files
Assuming your app service URL is https://YourWebAppName.azurewebsites.net, while being logged into Azure Portal, visit https://YourWebAppName.SCM.azurewebsites.net which is the Kudu site. You should be able to locate the log files by going to Debug console/CMD and navigate to “D:\home\LogFiles\http\RawLogs”.
Conclusion
It is easy to get Serilog up and running locally. But when you deploy the application to Azure App Service, a few extra steps are required so that logs are properly populated and accessible within the Azure App Service.
Many thanks for reading! Cheers!
